
Thursday, December 29, 2011
Saturday, December 10, 2011
SAVE THE DATE - March 21

Discover how to regenerate the Earth, our culture, and ourselves from the inside out ...
Eden Arising: Ecological Culture Design and the Inner Landscape
 |
| Dave Jacke |
Essentially, the goal of ecological design is to recreate the Garden of Eden—and why not?
In this age of high tech and information, we have the means to create food-producing ecosystems that work like healthy natural systems with minimal maintenance and diverse yields. Yet, tools and techniques are nowhere near enough: we must redesign our whole culture, our resources, our technologies, our social and economic structures, and our inner landscapes. In fact, it appears that we must redesign our deep internal structures to have any chance of succeeding in regenerating Eden.
Who do we think we are? What role should or does our species play in the ecosystems of which we are a part? How can the practice of ecological design teach us how to see, how to act, and how to be in our New Eden?
Dave Jacke will explore these questions with you and discover we can regenerate the Earth, our culture, and ourselves from the inside out.

ABOUT DAVE JACKE
Dave Jacke, primary author of the award winning two-volume book Edible Forest Gardens, has studied ecology and design since the 1970s, and has run his own design firm—Dynamics Ecological Design—since 1984. An engaging and passionate teacher of ecological design and permaculture, Dave has designed, built, and planted landscapes, homes, farms, and communities in the many parts of the United States, as well as overseas.
A cofounder of Land Trust at Gap Mountain in Jaffrey, NH, he homesteaded there for a number of years.
He holds a B.A. in Environmental Studies from Simon's Rock College and a M.A. in Landscape Design from the Conway School of Landscape Design. Jacke is also fluent in Sanskrit.
MORE Dave Jacke
Monday, November 28, 2011
NEW! from the Rivertowns Green Film Series

Rivertowns Green Film Series is thrilled to be showing The Last Mountain this Thursday, December 1, at 7 PM at the Greenburgh Hebrew Center, at 515 Broadway, Dobbs Ferry. Click here for your personal invite!
Questions - Kathy Dean at 914-693-7389 or kpokoik@verizon.net.
The Last Mountain, just released on November 1, 2011, is a passionate and personal tale of fighting a giant coal company that's trying to destroy a pristine mountain.
It features Robert Kennedy, Jr. and highights the extraordinary power of ordinary Americans when they fight for what they believe in, showcasing a battle for the future of energy that affects us all.
The Last Mountain was an Official Selection of the 2011 Sundance Film Festival and an Official Selection of the 2011 Full Frame Documentary Film Festival.
DIRECTOR’S STATEMENT

The central front in the battle for America’s energy future, with enormous consequences for the health and economic prospects of every citizen, is the fight for Appalachian coal. In valleys and on mountaintops throughout the heart of the eastern seaboard, the coal industry detonates the explosive power of a Hiroshima bomb each and every week, shredding timeless landscape to bring coal wealth to a few, and leaving devastated communities and poisoned water to many. With politicians siding with their corporate donors, it falls to a rag tag army of local activists to stand alone for the welfare of their families, their heritage and for a principled and sound energy future. Our film is their film – the uplifting story of the power of ordinary citizens to remake the future when they have the determination and courage to do so.
– Bill Haney
The Rivertowns Green Film Series is a collaboration between South Church's Roots & Wings, the First Unitarian Fellowship of Westchester and Greenburgh Hebrew Center. More info here.
Monday, November 7, 2011
Harvest Bounty's abundance
 |
| welcomed by Cameron, Kathy and Linda |
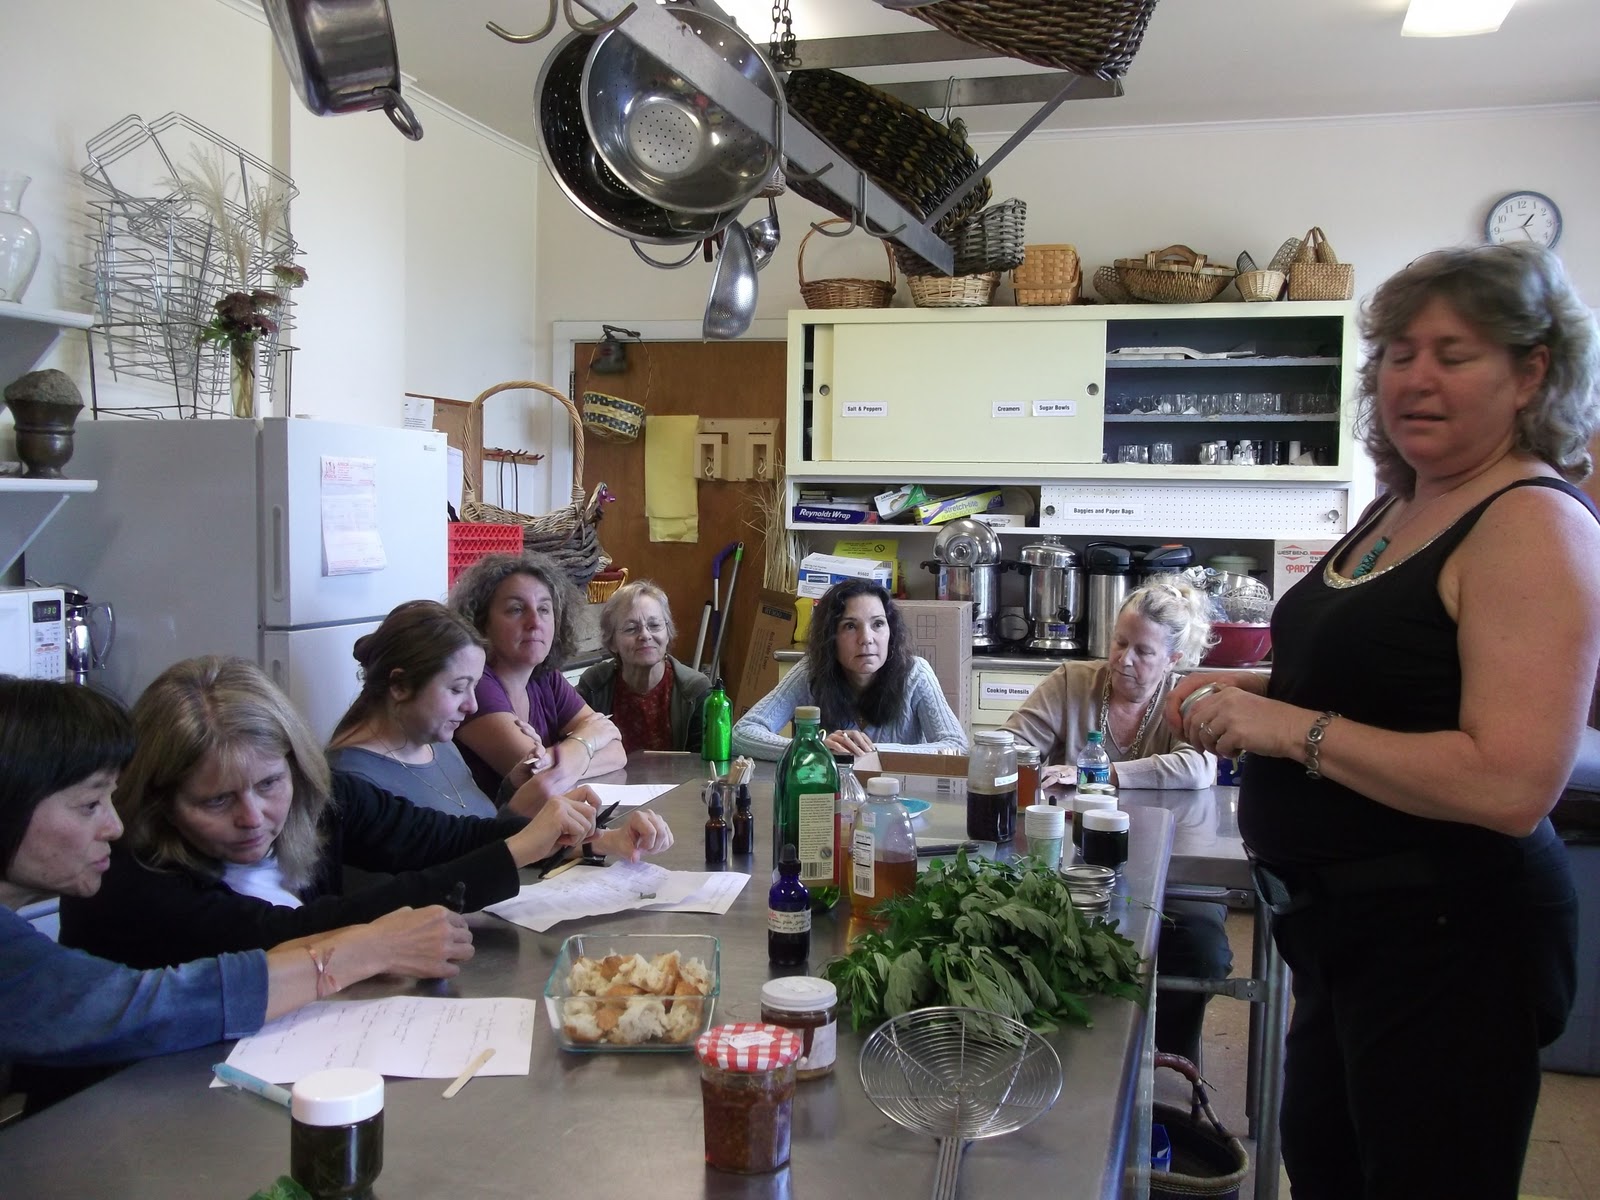
Bonnie Rogers' Using Herbs in Oils, Vinegars and Honey
by Linda Herring
Bonnie shared enticing bits of her vast knowledge of common herbs and their many benefits and uses in our lives. She discussed the simple techniques of combining herbs with organic olive oil, vinegar (mostly apple cider), or honey to create tasty, often medicinal concoctions. We were treated to tastes of a sage/mint elixir (for digestion), garlic/honey mix (for improved immunity), thyme oil (for bronchial clearing), chive vinegar, “fire cider” - a mix of onion, garlic, mustard, cayenne, horseradish and apple cider vinegar (build immune system) and many others. We made together a lemon balm/honey mix, rosemary/olive oil, and mugwort vinegar.
Nancy and Mark Mazur's Everything You Always Wanted to Know about Putting Food Up For Winter
by Kathy Dean
Nancy and Mark Mazur summarized everything you always wanted to know about putting food up for the winter. The couple started preserving food when they had too much produce from their backyard garden. Now they chose between canning, pickling, fermenting, drying and freezing. The seminar focused on fruits and vegetables. However they explained that some of the processes are applicable for meat. When learning to preserve food there are some initial modest costs, but once the basic equipment and material investments are made, food preservation is more about time and labor. Mark and Nancy emphasized that, regardless of the method used, it is most important to use fresh unblemished food prepared properly and that anything that comes in contact the food should be sterilized. The couple showed us various types of food preservation equipment and ended the session by sharing some of the foods they had preserved.
Margaret Van Ver Meeden's Make Your Own Jams and Jellies
by Sharon Deep

What do we need? Fruit, sugar, pectin (natural, around the seed of fruit, helps congeal) and little mason bell jars with lids and caps.
How do we do it? Put fruit, sugar, and pectin in a pot and stir over medium heat until thickened. When thickened, remover from stove. Spoon into jars. Put lids on. And then screw on caps. Whallah! Jelly.
Be creative. Play with sugar/fruit ratio. Play with pectin (some of us wanted to try to boil just fruit for the natural pectin and the natural sugar. Then use the boiled down supply in making a batch of jelly (using just some of what was boiled down as a substitute for using sugar and pectin).
Jody Stokhamer's Using Root Vegetables: For Juicing, Soups, Baking, and in Salad

by Linda Herring
Jody took us through a whirlwind cooking experience themed around root vegetables. Within an hour and 10 minutes, she demonstrated how to make a delightful and very healthy beet juice drink, a pureed parsnip soup, carrot muffins, and “confetti” salad, a colorful mix of raw veggies. Many healthful cooking hints were offered along with the recipes and of course, delicious samples.
Freidel Muller-Landau's Growing Your Own Mushrooms
by M.J. Wilson

Freidel Muller-Landau’s passion for the fruits of the forest floor was evident. During his session, we learned mushrooms are biologically more like animals than plants, there are A LOT of different species of mushrooms and some mushrooms are VERY prolific. He stressed it is important to respect this mysterious part of our web of life and ONLY eat mushrooms you are sure are safe. He showed us the materials he uses to grow oyster mushrooms in his backyard: oak log (best acquired in the spring where it has the maximum sap volume) and purchased fungi inoculated wood plugs. Freidel has been so successful in growing mushrooms he often has excess and he showed us various ways he stores them for future use with drying them being his preferred method. Growing mushrooms is a great way to have your own supply of this highly desirable, commonly expensive to purchase, nutritious delicacy.
Cameron Kelly's Sprouts and Baby Greens: A Year Round Kitchen Garden
by Sharon Deep
What to sprout? beans, alfalfa, broccoli, buckwheat.
Why to sprout? So fresh, living; simple; cheap; delicious and nutritious.
How to sprout?
- buy seeds from "Sproutman" on the web.
- put 2 tablespoons of seeds in a quart mason bell jar, filled with water, overnight (just for the first night)
- the next morning, put a piece of cheesecloth on top of jar, secured with a rubber band, and tip over to drain water
- leave turned over, on a slant, in a dish drainer
- from then on, for 2 to 3 times a day, fill jars with water and tip over to drain, leaving them on a slant in dish rack
- repeat until sprouted (it takes a few days).
Carol Permutter's Beginner Canning and Preserving
by Kathy Dean
Carol walked us through the basics of canning jams and jellies. She showed us the equipment, and then went through the process. She emphasized cleanliness as a way to avoid bacteria. Her humorous style of teaching made the techniques easy to learn.
Lucia Maestro's Seed Saving: Getting a Jump on Next Year's Garden
by M.J. Wilson
Seeds. The miracle of a new plant in a packet, the ultimate in nature’s “to go” packaging. Lucia Maestro shared her vast knowledge of these containment units of life force with us in this workshop. We learned the fundamental biology of seeds - how they come to be and how to care for them. Lucia talked of the different types of seeds and the specific requirements for harvesting them, processing them and storing them. For example, tomato seeds are created in a wet environment and require different preparation processing than turnips, which develop in a pod that can dry out on the plant. We learned there are different plants that are best grown from cuttings instead of seeds (potatoes), some plants need male and female plants in close proximity to produce viable seeds (spinach), some plants are wind pollinated and therefore very prone to genetic mixing (corn). Once dried, storing them in a clean, cool, dry maintains their maximum viability and durability. We were reminded that harvesting and storing seeds is a vital way to maintain the chain of life from season to season in our temperate climate and a way to know who we are by what we eat.
Sunday, October 16, 2011

Monday, October 10, 2011


Monday, September 12, 2011

Friday, July 15, 2011
south church composting

Ever clean up after a gathering at South and put the food scraps in the garbage? If you’ve begun to compost at home, it just doesn’t feel right to put coffee grounds and salad fixings into the trash. And if you haven’t begun to compost at home, Roots & Wings at South Church hopes to be your introduction to this green habit.
We’re pleased to let you know that South Church has the buckets, bins and a team ready to start community composting!

Because we're in summer mode at South (meaning the only groups using the building at this point are yoga and AA), there won't be much to compost during August. One family a week will check the compost bucket in the kitchen—at any point during the week—to see if AA or yoga has added compostables, and follow the steps below. As a reminder, you can compost any vegetarian food scraps. That includes cake, coffee grounds, and pizza crusts (no cheese or pepperoni!).
For a more complete list of what is compostable, click here.
For a more complete list of what is compostable, click here.
(During August Dave Person will also be working to come up with an easier way to lift the pallets for access to the composting area. Right now you have to lift the lids up against the building wall where they'll stay, then take the pallet off its slots, which is hard unless you have two people doing it.)
Beginning Labor Day, groups are back in the space so we'll need the "three times a week" checking. Here's who is lined up to do each slot:
Tuesdays - Roberts family
Fridays - Cadenhead family
Sundays- Cole/ Olsewski family
COMPOSTING STEPS AT SOUTH
- Go into the church kitchen and check the compost bucket.
- If there are appropriate food scraps in it, carry them around to the back of the church and add them to the middle bin (toward the center of the bin) along with any compostables you've brought from home.
- Then take leaves from the bin to the right and cover the "greens" (foodscraps) with "browns".
- If the material in the middle bin isn't moist (like a wrung sponge), you'd also wet it a little.
- Then you'd return the compost bucket to the kitchen, washing it out if necessary so it's ready for more compostables. It's that easy!
Thank you to our volunteers for taking on this project that's important to Roots & Wings, South Church, the user groups in the building, and the earth!

Thursday, July 14, 2011
WATERING: Slow Down and Share the Load

South Church now has rain barrels—look around the corner to the left of the sanctuary door! These two barrels catch the rain that flows off a small portion of the church’s large roof. All we have to do is attach a hose and we can water anywhere on the front lawn.
Linda, Susan and Lenore tried this the other night. “This takes so long,” we whined as we watered the Roots & Wings labyrinth in this sustainable way.
True. What a hose connected to (pressurized) city water could accomplish in 30 minutes would take an hour, maybe more.
“Sivananda ashram combines permaculture and yoga," mused Susan. "Maybe that’s purposeful—you need to slow down to garden like this."
Watering was on our mind that evening because the plants in the labyrinth are not thriving. Why?

“It doesn’t get enough sun,” suggested Cris Kossow.
“Could be dead pan,” said Susan DeGeorge. “The soil might be so compacted the water can’t get down any further.”
Or, the leaves we put in the raised beds might be leaching out nitrogen so not enough nutrients get to the plants.
But we think it’s the simple fact that we’ve been too busy to water properly. We stuck our fingers into the soil about knuckle deep or so. It was dry.
"Slow down and share the load" is the new mantra.
Here is the labyrinth watering schedule for the rest of the summer.
We recommend using a mix of rain barrels (if it has rained) and city water.
July 13: Lenore Lelah Person
July 14: Linda Herring
July 15: Chris Cole Olsewski
July 16 – 22: Amy Delaroca / Dunn family
July 23 – 29: Amanda Jacobs and family
July 30: Susan deGeorge
July 31 – August 6: Donna Thompson
August 7 – 13: Rachel Thompson
August 14 – 26: Linda Herring
We are still looking for volunteers for watering. If you want to be involved, please email Lenore_Person@msn.com
Local Foraging July 16 CANCELLED
we apologize but Local Foraging for Food & Medicine on July 16 with Dina Falconi is cancelled. The Old Croton Aqueduct is a State Park and as such we are not allowed to harvest along that land. You can catch Dina's workshop later this month at the Northeast Permaculture Convergence.
Friday, June 17, 2011

Take a "Weed Walk" on the Old Croton Aqueduct on July 16
Discover the wild and cultivated plants you can use for health and healing at Local Foraging for Food and Medicine, a Roots and Wings workshop with Dina Falconi on Saturday, July 16 from 10:00 AM – 3:00 PM at South Church, 343 Broadway, Dobbs Ferry, NY. Tickets are $30 in advance / $45 at the door and can be purchased at http://rootsandwingswestchester.blogspot.com. This workshop includes a delicious “wild” lunch. No one will be turned away for lack of funds.

Dina Falconi is a sought-after clinical herbalist who has been teaching classes about the everyday use of herbs for over twenty years for places as varied as Albany Medical College and Gaia Northeast to Wild Earth Programs. Based on what she grows and finds near her home in the Catskill Mountains, she produces her own line of natural bodycare products and medicinal tinctures.
Local Foraging is a six hour “best-of” of a Herbal Intensive she typically teaches over six months. Participants will take a “weed walk” on the Old Croton Aqueduct in Dobbs Ferry, then return to South Church’s kitchen to cook and make medicinal potions and herbal skin care.

This workshop provides inspiring, practical and thorough “hands on” herbal information on:
- Herbal Therapeutics
- Wild Plant Identification and Application
- Wild Food Foraging and Culinary Preparations
- Medicine Making
- Herbal Skin Care
- Nutritional Healing… and More
“As for the menu,” says Dina, “I am thinking we will make the following if the plants permit: wild salad with basic vinagrette, wild vegetable gratin, flower butter to spread on bread, wild green pesto to spread on bread, and ff wild berries are around, we will serve them with lightly, maple-sweetened whipped cream or organic whole milk yogurt.”
“Everyone will take home a remedy made during the workshop.”
Participants should bring: sun hats, water, baskets, scissors, notebooks and pen, and cameras (optional).

DINA FALCONI
Dina Falcone is part of the movement sometimes called “radical homemakers”—people who guided by simple principles of ecological sustainability, social justice, community engagement and family well-being to reclaim domestic skills. Some plant a garden, grow tomatoes on an apartment balcony, mend a shirt, repair an appliance, or provide one's own entertainment. Dina cooks and preserves the local harvest for food, medicine and pleasure.
Dina is a founding member of the Northeast Herbal Association, a chapter leader of the Weston A. Price Foundation and on the boards of Slow Food-Hudson Valley and Gaia Northeast, the action-learning regional center of Gaia University International. She organized the annual Family Farm Festival from 2003 – 2007 and is the author of Earthy Bodies & Heavenly Hair: Natural and Healthy Personal Care for Everybody. Listen to her interview on Herb Mentor Radio here.
Monday, May 23, 2011
Garden in Harmony with Nature

1. Create curves whenever possible. Energy flows in the most balanced way when curves are introduced. Avoid sharp, pointy angles that can send uncomfortable "arrow chi" towards buildings and people.
2. Be able to walk all around your house easily and have something green and alive on all sides of your home. This ensures accessibility to all of your garden spaces and hugs the house with positive green energy.
3. Give nature a place to remain wild in your yard. This encourages habitat for beneficial insects and keeps us connected to the earth and our roots.
 4. Use only safe organic fertilizers and pest control. Read the label. It if is hazardous to humans it is hazardous to the environment and our ground water as well.
5. Name your garden areas giving them focus and intention. The Cottage Garden, the Abundance Garden and the Fairy Garden are a few examples.
6. Reduce, reuse, recycle. Reduce the amount of water that you use by planting drought tolerant species. Reuse plants by dividing what you have extras of and sharing them with a garden friend. Recycle your plastic flats and containers at your local garden or recycling center.
7. Mix variety into your garden plan, allowing for different heights and textures of plants to compliment each other.

9. Incorporate comfortable seating into your plans so you spend as much time enjoying your beautiful spaces as you do tending them!

(c) Minnie Kansman
Eco-Balance Humanity in Harmony with Nature
www.minniekansman.com
Monday, May 2, 2011

Cole Crops Are In!

Residents of Children's Village started the seedlings in their greenhouse. Several of the children came to help us plant artichokes, cardoon, amaranth, cauliflower, collard greens, golden chard, rhubarb chard, chamomile, hyssop, Korean mint, and chives.


Neighbors stopped by to chat. We learned that Donald and his pug walk the labyrinth twice a day!
After planting, we covered the little seedlings with protective mesh to keep the wild animals from nibbling them down to nothing.
Just two days after the Royal Wedding, it looks appropriately white and veiled.
Thursday, April 21, 2011
Labyrinth Planting Phase 1: April 30, 10 AM

Just went by Children’s Village today to see the growing miracles. We’re going to gather to plant them in the Roots & Wings Labyrinth on Saturday, April 30, at 10 AM. Come!
We’ll be planting the labyrinth in phases. Broccoli, beans, snap peas, early butternut squash, tricolor zucchini, gold beet, and wachchichu flour corn will be planted directly from seed later this spring.
 A lurking fear… how will we keep the deer away from our small and tender plants, perfect for chomping?
 Linda
Wednesday, April 6, 2011
spirit in the garden
Can you feel May right around the corner now that spring has FINALLY sprung? I sure can. And that means our next Roots & Wings workshop is fast approaching as well.
 |
| Minnie Kansman |
Next up will be a day of deep gardening and wisdom sharing with the delightful Minnie Kansman from Lowell, Michigan, author of Spirit Gardens: Rekindling our Nature Connection.
I met Minnie back in 2003 at a feng shui conference. Before that time I had known her only in cyberspace from a Sacred Space practitioners egroup which we both belonged to. I remember thinking, “I hope she is as delightful in person as she seems in her posts.” And that she was!
 Little did I know then that we would go on to have many amazing adventures together over the course of the next eight years. I have journeyed to her home on two different occasions to attend certification classes in both feng shui and space clearing, spending time on her land immersed in the incredible landscapes she has co-created with Nature.
 We’ve also made hand drums, attended symposiums and retreats, swapped stories and walked miles in Central Park on a 95 degree day in August. No matter the setting, the season or the weather, time with Minnie is always a time of rich, delightful and Spirit filled sharing.
Minnie’s presentations will be held at South Church on Saturday, May 14 and divided into two segments. First up will be Rekindling Our Nature Connection in the morning from 10 to 12:30. Then another delicious lunch together. Then the afternoon event, Feng Shui in the Garden from 1:30 to 4 pm. Please note that you may choose to attend only one of these workshops if scheduling is an issue however lunch is provided only for those who attend the full day.
Donna
Wednesday, March 16, 2011
Tapping the Maple Tree
 Before Ethan Roland began the Sustainable Suburbia workshop, he asked, "Are there any maple trees on the property?"
We weren't sure but he pointed out one to us, right in front of South Church. "It's not a sugar maple, but you can tap any maple."
 We gathered around and he thanked the tree before tapping it.
Later he taught the children the chant "maple tree, maple tree, please please please please please please drip."
 He showed us how to tap the tree and we took turns turning the drill.
We tied a milk jug to the tap and left it there for a few hours.
 By the end of the day there was sweet "maple water" for us all to drink.
The Lenape would freeze this liquid to separate the water from the syrup, Ethan explained.
People and animals would drink this at the end of the long winter. And so we did, too. It was refreshing--like cold water with just a hint of something sweet.

vermicomposting
Composting during the winter months can be a challenge, at least for me. Adding table scraps to an outside bin that is alternately freezing and thawing for several months can—when the final thaw comes—just end up a gray mushy (and often anaerobic) mess. To avoid this, some of my friends freeze their table scraps during the winter and then, when spring comes, add them little by little to their other compost material. We don’t have that kind of extra freezer space. So, as an alternative, we got more worms.
 I’d first set up a worm bin early in the fall as part of my Master Composter Recycler training. There we’d each taken a small plastic bin, drilled a few holes into it for air space, lined it with some dirt and shredded newspapers, sprayed the lining material so that it had the consistency of a sponge that had just been wrung out, and then added three or four red wigglers. I brought the bin home, stuck in about a third of an apple core, and put the bin in a kitchen cabinet.
 Worms can eat about ½ their weight a day, so three worms didn’t need much food. And, if you’re lucky, they double their number every two months, so the worms in that bin weren’t going to be eating much more food in the near future.
 In November, as the outside composting began to slow down, we discussed the possibility of increasing our vermicomposting. We decided that, rather than just adding more worms to our small bin—an option I’d learned a fellow Master Composter was about to take— we’d move to a bigger bin. If we’d had time we could have made such a bin fairly easily, but instead we decided to buy one. There are so many options out there—worm farms and worm cans and worm benches and more. We eventually chose a three layered system that could easily fit in the corner of our dining room. We set it up, layering coir and wet newspaper into the first layer of the system. The two pounds of red wigglers we’d ordered arrived a few days later and we were good to go.
 Each day or so since, we cut up any large table scraps that we have, add the smaller scraps and put them in our worm bin. We cover most of the food with the newspaper, coir, leaves, or dirt in the bin and the worms begin their work. Worms will eat most fruit and vegetables, as well as stale bread, pasta, rice and paper of various kinds. We’ve learned though that worms—or at least our worms—still have preferences for what they’ll eat first. If given a variety of choices ours will choose banana peels or melon rinds any day and will only move toward potato peels as a last resort!
 One way to tell if your worm bin is working correctly is by the smell –or more accurately, the lack of smell. If you’re near our worm bin most days, you smell absolutely nothing. If you take off the lid and put your nose close to the bin, you’d notice a fresh earth type smell. But one morning I opened the lid and there was an unpleasant smell, telling me something was off. I checked the collecting tray at the bottom of the bins and there was liquid in it, telling me that the bins had too much moisture in them. I corrected the problem by adding some dry shredded newspaper to the bin to absorb the water. The unpleasant smell quickly disappeared. For a few days afterwards, to make sure the problem was gone, I also avoided adding food like tomato or melon that have extremely high moisture content.
Little by little this winter, the food we’ve been adding has changed to vermicompost. These worm castings are extremely nutrient-rich and work as a wonderful organic fertilizer, both for houseplants and outdoor vegetation. When it’s time to put our seedlings outside in a month or so, we’ll have a good amount of environmentally friendly, beneficial vermicompost to topdress the soil in which they’ll be growing.
Susan
Welcome to all who attended Sustainable Suburbia
This past Saturday's workshop, Sustainable Suburbia with Ethan Roland, was a fantastic event! We all walked away feeling that we'd learned a lot about sustainable options for our land, and that we’d connected with others interested in shifting to a more resilient way of life.
 |
| we all loved Farmers Market Soup |
A few highlights from my notepad…
Our vision for sustainable suburbia: sharing, cooperative, beautiful, interesting, intriguing, thought-provoking, healthy, production, nourishing, lush, fertile, abundant, frugal, resourceful, intergenerational, community-rich, zero-waste, respectful, caring.
Ethan Roland’s definition of permaculture: “doing what meets human needs and increases eco-system health.”
Ethan Roland’s definition of permaculture: “doing what meets human needs and increases eco-system health.”
Four goals of edible landscaping:
- grow food everywhere
- use organic and biological resources
- choose multiple functions
- design for beauty and diversity
 |
| Ethan showing the children how to tap a Maple tree |
A good number of people asked us if we could organize a “sustainability support” group. A place to talk about what was and wasn't working in their gardening, composting, beekeeping, etc. Know that this is in the works.
Thank you Ethan Roland, and everyone that attended Sustainable Suburbia. If you are reading this, make sure that you sign up to receive our online newsletter so that we can keep in touch. The opt-in box is on the right of this page.
Lenore
Tuesday, March 8, 2011
Sustainable Suburbia on March 12
Learn how to make your backyard beautiful and productive this year with Ethan Roland of AppleSeed Permaculture, the Hudson Valley’s #1 Edible Landscaping Firm
at South Church, 343 Broadway in Dobbs Ferry
 Topics covered:
- Edible landscaping
- Sustainable lawn care
- Design for beauty and diversity
Approach your garden differently this year. Get a head start by choosing the right herbs, flowers, greens, roots, fruits and berries for your site and the best ways of planting them. Learn simple tools and techniques to reduce the amount of money and time you spend on your lawn. Take home ways to create a yard that’s beautiful and productive.
Includes Farmers Market Lunch of soup, bread, salad and cheese
No one turned away for lack of funds
Questions? Contact us here
Soil Testing
One of the first steps we took before laying out the Roots & Wings labyrinth, on the front lawn of South Church, was to test the soil. The most common tests to have done are the nutrient levels—particularly the pH—and for heavy metals like lead.
We decided to just do the nutrient level test as we were sheet mulching and the plants' roots would not touch the existing soil.

 |
| Sheet mulching involves creating layers above the grass. |
WHERE TO HAVE SOIL TESTING DONE
- We used Agro-One Services to test the specific soil on South’s front lawn for nutrients (they can also test for heavy metals). You can obtain forms and directions here or pick up sample boxes and forms at Cornell Cooperative Extension of Westchester County, 26 Legion Drive, Valhalla, NY 10595. The boxes and forms are free, the test is about $10.
- Lea Culled-Boyer, Hastings resident and Managing Director of the Green Guru Network, recommends Environmental Working Group to test for heavy metals and Westchester County’s own testing facilities. She says, “EWG's tests are more affordable.”
- Susan DeGeorge, Roots & Wings member, recommends websoilsurvey.nrcs.usda.gov. She says, “This gives the geological history of an area, different soil horizons in the area, parent material that the soil is made from, how far down the water table is, etc.”
WHAT WE FOUND OUT

- Our pH level is excellent, at 6.3, and everything else looks fine.
BUT WHAT ABOUT THE HEAVY METALS?
Some of us still wondered about the possible presence of lead and the aluminum that showed up in the soil (too much active aluminum can kill plants by inhibiting root growth).
Some of us still wondered about the possible presence of lead and the aluminum that showed up in the soil (too much active aluminum can kill plants by inhibiting root growth).
Susan asked her soil science teacher David Bulpitt who is both a soil instructor at the New York Botanical Gardens and a principal of Brookside Nurseries in Norwalk (which specializes in soil and soil mixes for horticultural uses). Here's what she learned.
“For aluminum: a pH above 5.5-6. or so should take care of the problem since it can't be water soluble in a neutral or alkaline soil. For heavy metals (lead, etc.) a higher pH also means they're less soluble. Applying that to our soil sample, I think that means we should be okay as long as we keep the pH where it is (since it's just a little above 6). We need to watch doing things that could lower the pH though."
If you have additional questions regarding soil testing procedures, contact Jerry Giordano at Cornell University Cooperative Extension of Westchester County at westchester@cornell.edu. You may also contact Agro-One directly through Dairy One at 1-800-344-2697 x 2179 or x 2172 or email mark.joyce@dairyone.com.
Subscribe to:
Comments (Atom)